Publications
 Partners


Put away the clippers and try this trick. It’s one that’s been around for a while, so it must work, right? I put it to the test. And it passed. Who knew that your favourite ceylon, rooibos or earl grey tea could hold the secret to saving your manicure? The low-down: If you break a nail, apply a base coat across the break, then soak up any excess with a small square of dry teabag. It will fuse the nail together. Then apply colour and finish with a strengthening top coat. What I discovered: It works for a day or two, but it’s best to head to your manicurist for a more permanent fix.
Want To Give It A Shot?
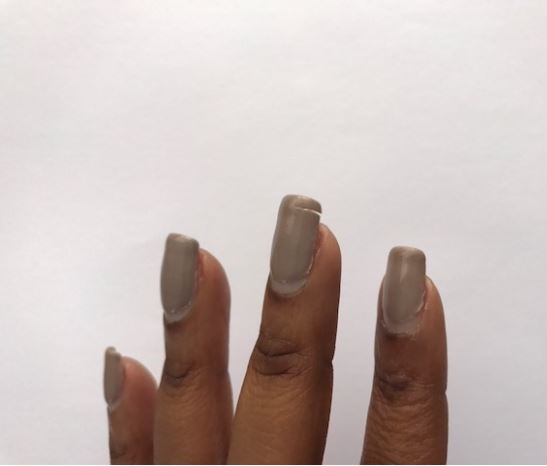
Exhibit A: My broken nail.
What You’ll Need To Fix That Nail
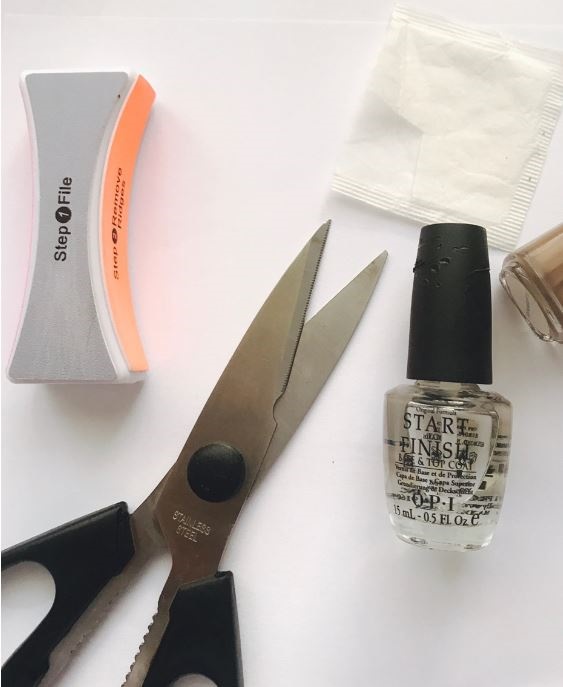
1. A teabag: it acts as the glue.
2. ?A base or top coat: the adhesive.
3. ?A fine nail file: to smooth the teabag into the nail.?
4. A nail polish: to cover and seal.?
5. Scissors: to cut teabag – obvs!
READ MORE: These 4 Things Could Be Why Your Nails Are Turning Yellow
Step 1: Dry the tears.
Step 2: Cut out a section from the teabag.

Step 3: Apply base coat to ensure the teabag sticks.

Step 4: Place teabag on the nail, covering the crack.

Step 5: Trim teabag to fit your nail.

READ MORE: How Your Hands And Nails Change In Your 20s, 30s And 40s
Step 6: Smooth out the teabag, then add another teabag layer if required.
Step 7: Wait for your base coat to dry.
Step 8: Buff off the excess teabag and file the edges down.
Step 9: Paint the nail as you normally would. (Two to three coats is best.)

Step 10: Wait some more… Done.

Meet the Internet’s latest beauty obsession (and it’ll save you cash too). Plus: Why is everyone suddenly putting condoms on their make-up sponges.
This article was originally published on Women's Health.