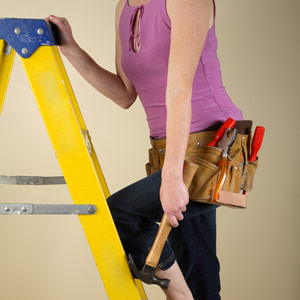
We've all had disastrous DIY experiences. Some more than others. But with every lesson learnt, there are pieces to pick up in the aftermath.
So, what better than to learn from other people's disasters? We gathered some disasters from near and far (and promised to keep the offenders anonymous) and put them to the experts.
Disaster #1
I moved into a new house and started to fleck away paint that was peeling off a wall, preparing the surface to repaint it. I got totally carried away, until I realised I was pulling plaster off. The pros had to completely replaster the entire wall – it was an old house.
Solution
Tap on the wall to ascertain the condition of the plaster, says seasoned handyman Grant Warren. A hollow sound means that it has pulled away from the brick work, is probably riddled with hairline cracks and is likely to come off in chunks if you expose it or scrape it too aggressively. Another thing to look out for is dry, powdery plaster – given attention with a scraper, this will also come off the wall. Even if it doesn't, painting over it is problematic.
Obviously, these problems should be sorted out, and there is no easy way. Replastering the wall will probably save you money in the long run. If it is an old house, make sure that your plasterer uses lots of lime in his mix as this slows down the drying process and makes for softer plaster, which will expand and contract with the old bricks. Strong plaster will expand and contract at a different rate to the bricks, just to pull away all over again. If the wall is not too bad and you want a quick fix, take note of Grant's tips:
Disaster #2
I tried to put a TV aerial on my chimney and pulled several old, dry bricks away in the process. The chimney partially collapsed.
Solution
First carefully inspect the area you intend fixing the aerial and make sure that the bricks aren't loose, says Peter van Wyk of Maxim Construction. If the area is plastered, tap on the plaster. If it sounds hollow then don't attach anything, as it will probably pull loose in a storm and land on your neighbour's car.
Disaster #3
I once did a pull-up on my security gate when it was open and the whole gate just fell out of the wall. I did some serious damage to my coccyx.
Solution
Lindy Barry of Trellidor says it sounds like this DIY disaster was the result of installing a swing gate rather than a professionally fitted sliding security barrier, which would be under guarantee. Professionally fitted security gates are screwed into the door reveal or fitted face-on using tamper-resistant screws that can only be fitted or removed with a custom-made drive socket. Lindy suggests using high-tensile rivets to attach the door components as these can withstand a severe battering. Oh, and do your exercises at the gym.
Disaster #4
I climbed on my roof to check a leak and put my foot through the perspex roof sheeting.
Solution
Perspex sheeting is generally not made to be walked on. If you have to climb on the roof, says Peter, make sure you tread on the timber support beneath the sheeting. You can normally see the shadow of the timber through a perspex roof; if not, walk where the roofing screws are as these are fixed into the timber. "If you are unsure, lie a scaffold board over where you think the supports are," he says. "This will help distribute your weight over a larger area and give you more freedom on the roof."
Disaster #5
I decided to fit a unit on the garage ceiling for extra storage. What could be simpler? Four hang-down sections and a couple of cross beams. By Sunday afternoon the ceiling had caved in. The chippy who came to fix it laughed his head off. R290 for the initial wood cost turned into R6 900. Still no overhead storage.
Solution
If you are fixing something to a ceiling, make sure it's a concrete one and not plasterboard, says Peter. "Use expansion bolts as these are the only ones that will hold, however I would not recommend fixing anything to a ceiling – rather fix to a wall. If you want to make sure it doesn't come loose, use sufficient expansion or rawl bolts." If you're fixing a cupboard to a wall, ensure it has fixing points on its back panel, otherwise the bolts will simply tear a hole in it. If it's going to contain heavy items then it may be advisable to stand it on brackets as well as securing it to the wall.


 Publications
 Partners


