Publications
 Partners


Hard labour:
5/10
Skill level:
7/10
Time needed:
3 hours
Finished size:
762mm, 711.2mm wide, wide, 285.75mm deep
Shopping list:
• Two pieces of planed pine cut to: 25.4mm x 304.8mm x 711.2mm
• Two pieces of planed pine cut to: 25.4mm x 304.8mm x 723.9mm
• Two pieces of planed pine cut to: 25.4mm x 304.8mm x 673.1mm
• Wood glue
• 2 bar clamps
• Scrap wood
• A damp rag
• Drill and drill bits
• 8 x 38.1mm wood screws
• 8 x 38.1mm wood brackets
• 16 x 12.7mm wood screws
Tools:
• Ruler
• Pencil
• Measuring Tape
• Level
• Wood stain, a brush and clean rags
• 220 grit sandpaper
• Clear polyurethane finish
• Screwdriver (optional)
What to do:
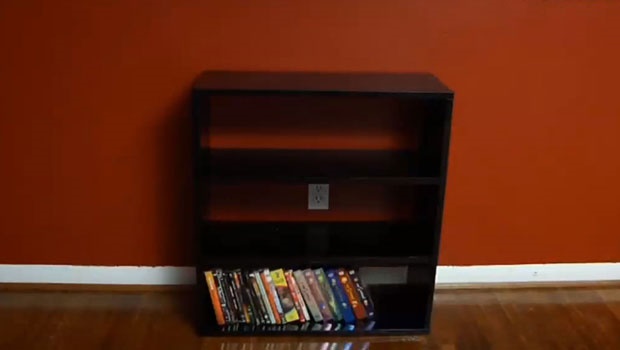
Book cases are relatively easy when it comes to the world of DIY. These instructions are for a 76cm high, 71cm wide, wide, 336cm deep bookcase.
1. Attach pieces
Using a lot of wood glue, attach each of the 711.2mm pieces to both ends of the 723.9mm pieces so the planks form a rectangle with the shorter pieces on the top and bottom. Hold the pieces in place by using the bar clamps.
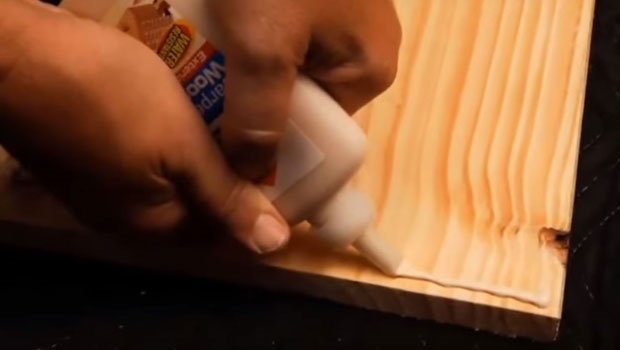
TIP:
Put pieces of scrap wood between the clamps' grips and the wood to avoid damaging the bookcase.
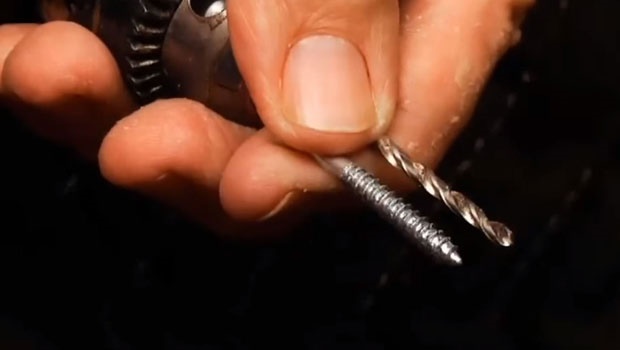
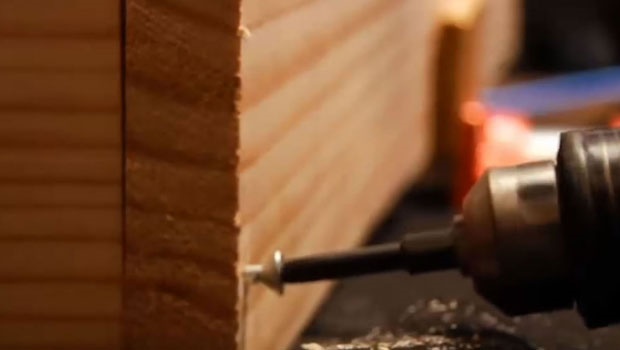
2. Drill holes
Mark the four corners of the top and bottom planks, about 25mm in from the back and face of the frame, and 9.52mm in from the sides. Drill eight holes on the marks by using a drill bit that’s a bit smaller than your 38mm wood screws.
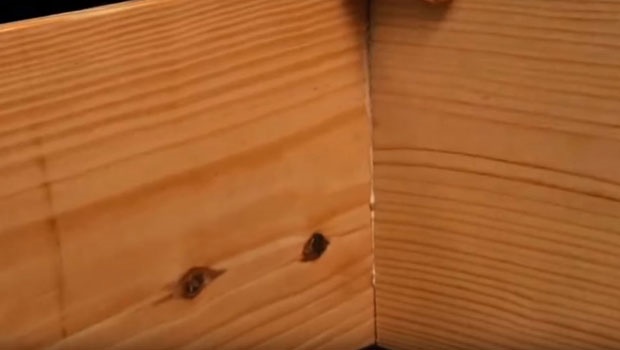
3. Attach the boards
Screw the wood screws into the holes using your drill's screwdriver attachment or a manual screwdriver. Wipe away excess glue with a damp rag and let the glue dry overnight.
4. Decide where you want to put our shelves
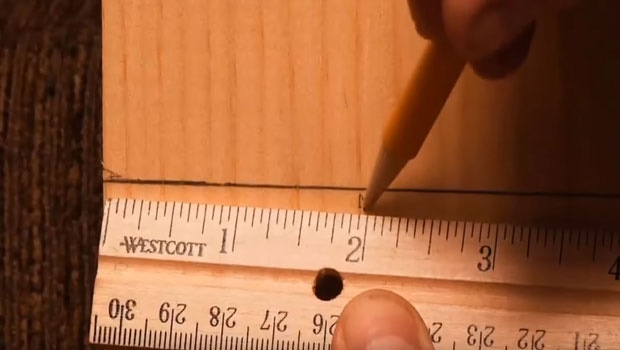
Take the clamps off and stand the bookcase upright. Think of your tallest book (and measure it) to decide on where to place your shelves. Measure and mark where the shelves should go. Starting with the left side, make a straight pencil line exactly where you want the first shelf to go. Repeat on other side of bookcase.
5. Mark a spot for the L-brackets
Start with the top shelf. Mark a spot on the inside left side of the bookcase, 50.8mm in from the front of the bookcase and 50.8mm in from the back, directly below the line you've marked in pencil. This is where two of the L-brackets will go. Repeat on the right side of the bookcase.
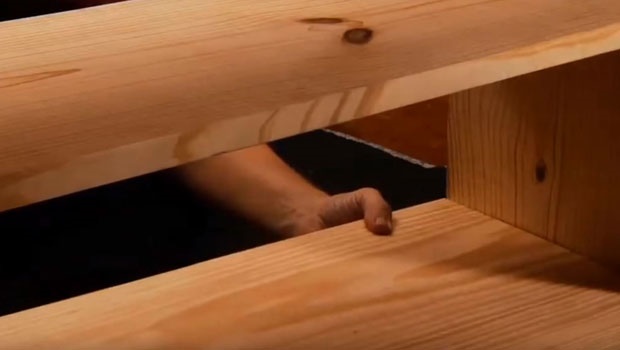
6. Install brackets
Holding an L-bracket upside down, mark where to drill. Securely install the L-brackets with the 12.7mm screws. Repeat with the other side. Guide the top shelf onto the L-brackets. Use the level to make sure the L-brackets are aligned on either side of the shelf.
7. Add shelves
It’s time for your other shelf. Add the other set of four L-brackets for where your other shelf goes. Place the bottom shelf onto the L-brackets. For extra stability, glue and screw the shelves into place.
8. Stain it and wait for it
Apply the wood stain with a brush, and allow it to penetrate for 10 minutes. Remove the excess with a clean rag. Wait at least six hours and apply a second coat. When that dries, apply a coat of polyurethane. Allow to dry for 12 hours.
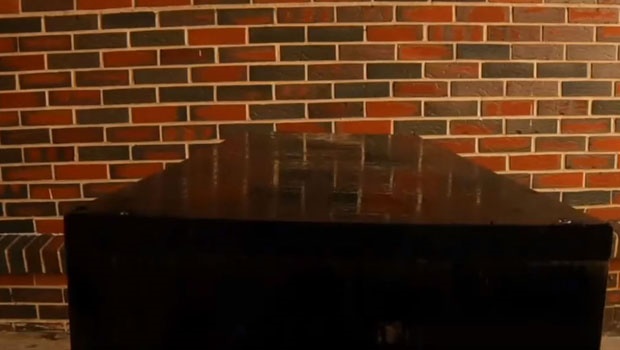
9. Sand and finish
Sand the bookshelf lightly. Apply a second coat of clear finish and wait until it dries.
10. Adding the books
Place your shelf in its final spot. Add your books. Call all your friends to come and admire your handiwork.
For a more visual how to, check out this video.