


 Publications
 Partners


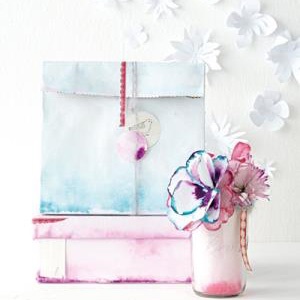
You will need:
• watercolour-effect paper
• scissors and pencil
• glass jar
• yarn
• craft glue
• double-sided tape
• washi tape and ribbon, to decorate
To make:
1 Unscrew the lid, trace the shape on to the paper and cut out. Attach to the lid with craft glue.
2 Cut paper to fit inside the jar. Roll into a tube inside the jar and secure the ends with double-sided tape.
3 Apply craft glue to the side of the lid and wind the yarn around it.
4 Attach the paper flowers to the lid with craft glue, and add washi tape and ribbon.
TIP: Use a glue gun if your flowers are heavy.
2. Make a cute holder
Spray paint the metal screw band of the lid of the jar white. Stick a piece of fabric on to the lid – use spray glue to avoid any ugly marks – and trim the edges neatly.
Stick a paper doily on to the side of the jar. Thread a ribbon through the holes in a crocheted doily then tie the ribbon around the jar.
Tag: Sponge a little white paint on a bought tag then cut out a small fabric circle and stick to the card.
3. Make a whimsical butterfly jar
You will need:
• decorative paper for the top of the lid
• butterfly pictures
• flower picture
• thick double-sided tape
• craft glue
• dressmaker’s pin
• scissors
To make:
1 Cut a circle from your decorative paper to fit precisely within the edges of the metal lid. Stick it on top of the lid with craft glue.
2 Cut out two identical butterflies and stick one to the lid using the thick double-sided tape (the type used for mirrors). Fold the wings of the other butterfly upwards and attach it to the first butterfly using a dressmaker’s pin.
3 Roll the paper with the flower picture on it into a tube and place it inside the jar so that no one can see the contents.
4. Personalise your container by adding pictures
Fill it with buttons and pieces of ribbon or lace for someone who loves needlework.
You will need:
• small stitchcraft-related pictures (1 for the lid and 1 for the tag)
• page from an old book
• pompom cord or ribbon
• matching thin cord
• small button
• resin, hardener and ice-cream stick or tongue depressor
• grey spray paint undercoat
• modge podge
• craft brush
• double-sided tape
• scissors
To make
1 Unscrew the ring from the lid and spray paint with undercoat, leave to dry and stick a piece of pompom cord or ribbon around the edge with double-sided tape.
2 Cut the picture to fit precisely within the lid. Paint modge podge over the front of the picture, leave to dry and repeat on the other side to seal it against the resin.
3 When it is dry, paint modge podge over the lid. Place your picture in the middle, smooth it with your fingers and paint on another layer of modge podge. Leave to dry and apply more modge podge.
4 Protect the picture with a layer of resin. It gives a lovely finish.
To make a tag: Cut your other picture into a circle and cut a slightly larger circle from the book page. Make a small hole through both circles and thread through thin cord or ribbon. Thread the ends through a small button and tie to the jar.
5. Make a holder for your baking utensils
You will need:
• 2 pieces of matching fabric
• 7cm Styrofoam ball
• glue gun
• decorative hat pins
• cupcake design on paper
To make:
1 Cut two strips of fabric approximately 3-4cm wide and about 80cm long.
2 Cut the Styrofoam ball in half and use the glue gun to stick one half to the lid of the jar.
TIP: If you are using a jar with a ring and lid, glue the two together to make it easier to work with.
3 Twist the fabric strips together from one end, making sure that both fabrics are visible. Starting at the top of the Styrofoam ball, stick the fabric to the Styrofoam with the glue gun.
Dot a little glue on to the Styrofoam and twist and stick the fabric down. Continue to twist, turn and glue the fabric around the Styrofoam ball until the ‘icing’ of the cupcake is complete.
4 When you near the bottom of the Styrofoam ball, cut the fabric so it will be just long enough to finish covering the ball. Fold the end of the fabric back on itself and stick down on the Styrofoam. Stick hat pins in to finish it off, if you prefer.
How to make a tag: Cut out the cupcake design from the paper and glue it to a circle of fabric. Attach to the top of the jar using a hat pin.
6 Fill the jar with baking items such as cookie cutters, icing nozzles, cake sprinkles and cupcake liners, all in matching colours.


