


 Publications
 Partners


1 Mark out a 1.8m diameter circle on your chosen site and dig to a depth of 75mm. Compact the ground and cast a 75mm slab of medium strength concrete. Compact the concrete, cover it and regularly spray with water while letting it cure for about seven days.
2 Mark out a 1.6m diameter circle on the slab. This forms the outside of the base wall. Mark an opening for storage space and start building to the desired wall height.
TIP: Don’t mix too much cement at a time as it will dry out quicker than you can build and you will have to throw it away.
3 After seven days, the oven base can be cast in location. Preparation for this can, however, start immediately.
The framework needs to be strong enough to hold the weight of the wet concrete once it’s cast, position nine brick pillars inside the wall and spread them out to distribute the weight as evenly as possible.
Old cupboard doors were used at the bottom and scrap plywood for the sides – the concrete slabs need to be at least 75mm thick; seal the framework well to avoid the concrete leaking, and cover the wood with Vaseline or oil so that it doesn’t stick to the concrete when you remove it.
Remember that the concrete must be reinforced with steel rods that must be placed crisscross over the concrete. Pour half the concrete, put the rods in place, then pour rest. The concrete must then be compacted throughout.
Remember a high strength concrete can set very quickly. Cover the slab, wet regularly and leave to cure for seven days.
4 Mark a 1.4m circle on top of the slab to indicate the position of the oven base. Identify the position of the oven floor and build the opening, as shown; the width must be ±440mm and the height 310mm.
5 Lay ‘soldier’ bricks (the uprights) to form the base of the dome. Let them stand for at least a day before you continue.
6 You can now lay the floor. Place a layer of sand or fine stone on the slab and slope down gently from the back of the oven towards the door. You can use fire bricks or paving slabs, or a cheaper option old stoep tiles. Lay them as close together as possible. Cement the bricks/tiles at the door in position.
TIP: Cover the floor with plastic to capture any cement that falls into the oven while building the walls.
7 Cut out 24 identical, equally-sized shapes that will form the dome support; these shapes must meet in the middle of the oven floor, so some basic maths is required here. You can make a template and cut the 24 shapes from this; use shutterboard, a very strong cardboard.
REMEMBER: Once the oven is built, you have to get this support out – and, as there is plastic in there, a fire is out of the question at this stage.
8 Build the sides up, row by row – naturally, this takes some time. Use the shape of the dome support for each row being laid, and try to keep the gap between the bricks on the inside as narrow as possible. It will help to cut up lots of bricks beforehand in 2/3, 1/3 and 1/2 sizes. The closer you get to the top, the longer it takes.
REMEMBER: Leave a gap for the chimney; once the oven is closed on top you can start with the chimney.
9 Cut the bricks in half, lengthways. Build from the bottom up and from the front to the back so that the smoke will extract effectively once in use.
10 Let the oven stand for 14 days, covered in a plastic sheet, once building is complete. Then remove the support and sheet and clean thoroughly.
Optional: A coat of paint would be a great finishing touch.
Addition tips:
• Choose the site carefully and be sure to take prevailing winds into consideration.
• Because the materials used are porous, the oven will get wet when it rains and it will take a very long time to warm up; good quality paint will prevent this.
• Search the internet for a set of plans that suit your taste and pocket and follow these carefully as costs can easily become exorbitant. Avoid overseas plans because materials won’t be readily available.
• Don’t skimp on the materials for the oven floor as this is where the heat is retained.
• Take your time and be patient – a lot of time is spent waiting for drying and curing during the different stages of the building process. If they say wait 14 days, then please wait 14 days!
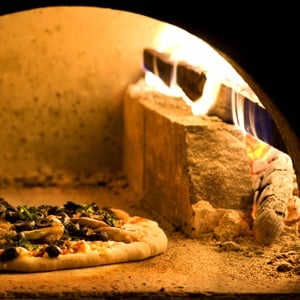
• Important Once the oven is built and the curing process is complete, you have to burn three to four small fires in the oven over a period of days to ensure that it is completely dry inside as an incredible amount of moisture will still be retained in the floor and walls. And the more moisture there is, the less heat you will have.
• If you find that pizzas are not cooking properly at the bottom, make the fire in the centre of the oven until you are happy that the heat is where you want it. Then shift the coals to the side so you can start firing.
Source: Home magazine


