Publications
 Partners


Photographs Francois Oberholster
Bake a cake yourself or buy an ordinary one with plain icing and get out that piping bag that’s been lying unused in the drawer for so long! It may take a bit of practise – luckily, you can put any flops back into the piping bag and try again...
1. Make the icing
BASIC BUTTER ICING
100g softened butter
500ml (250g) icing sugar, sifted
10ml vanilla essence
about 25ml milk
food colouring (optional)
Beat the butter and sugar together until light and fluffy. An electric beater or mixer makes the task much easier than doing it by hand. Add the vanilla and just enough milk to make the mixture light and creamy. Now you can divide the icing into different bowls and carefully add a few drops of food colouring to each to get the colours of your flowers.
2. Fill the piping bag
• Attach the nozzle of your choice to the bottom of the piping bag.
• Stand the piping bag in a glass measuring jug or jar with the nozzle at the bottom. Fold the cuff of the bag over the edge of the jug; this helps you to spoon in the icing without creating air bubbles – and the top of the bag stays clean.
• Fill the piping bag by no more than two-thirds. If you're using more than one colour icing, spoon each colour into a separate bag.
• Squeeze out the air and close the top of the bag tightly before you start to form the flower shapes. Always hold the bag at the top with your writing hand while you squeeze, and the lower end with your other hand. Squeeze the flowers onto a sheet of baking paper or a clean chopping board that can fit in the fridge.
• Follow this technique for each of the flowers below, then refrigerate to harden.
3. Pipe the flowers
It's easier than you think – and the possibilities are endless!
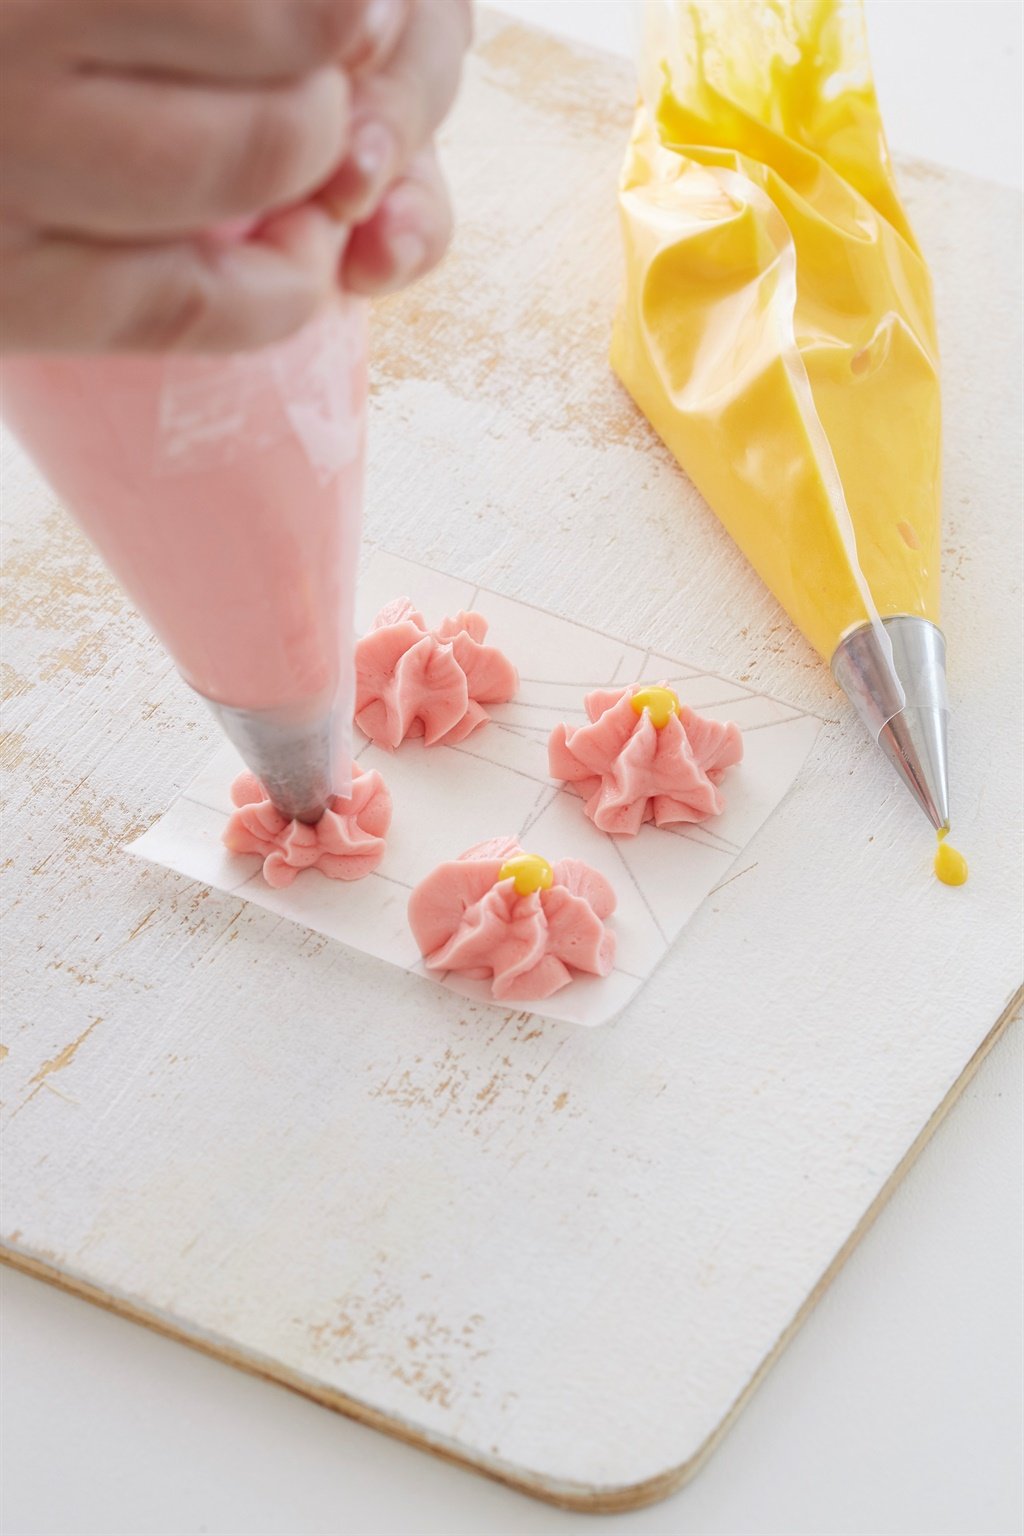
DAISY, DAISY
• Fill a piping bag with a star nozzle with butter icing in a colour of your choice.
• Holding the nozzle at one spot near the surface, squeeze out the icing from the back of the piping bag; apply constant pressure without lifting the bag until a star-shaped daisy forms around the nozzle. Once you’re happy with the ‘star’, stop applying pressure and lift up the nozzle carefully. Repeat to make more flowers and try to keep them all the same size.
• As a finishing touch, you can use a second piping bag with a small, round nozzle and yellow icing to create a yellow dot in the centre; or use store-bought decorating balls.

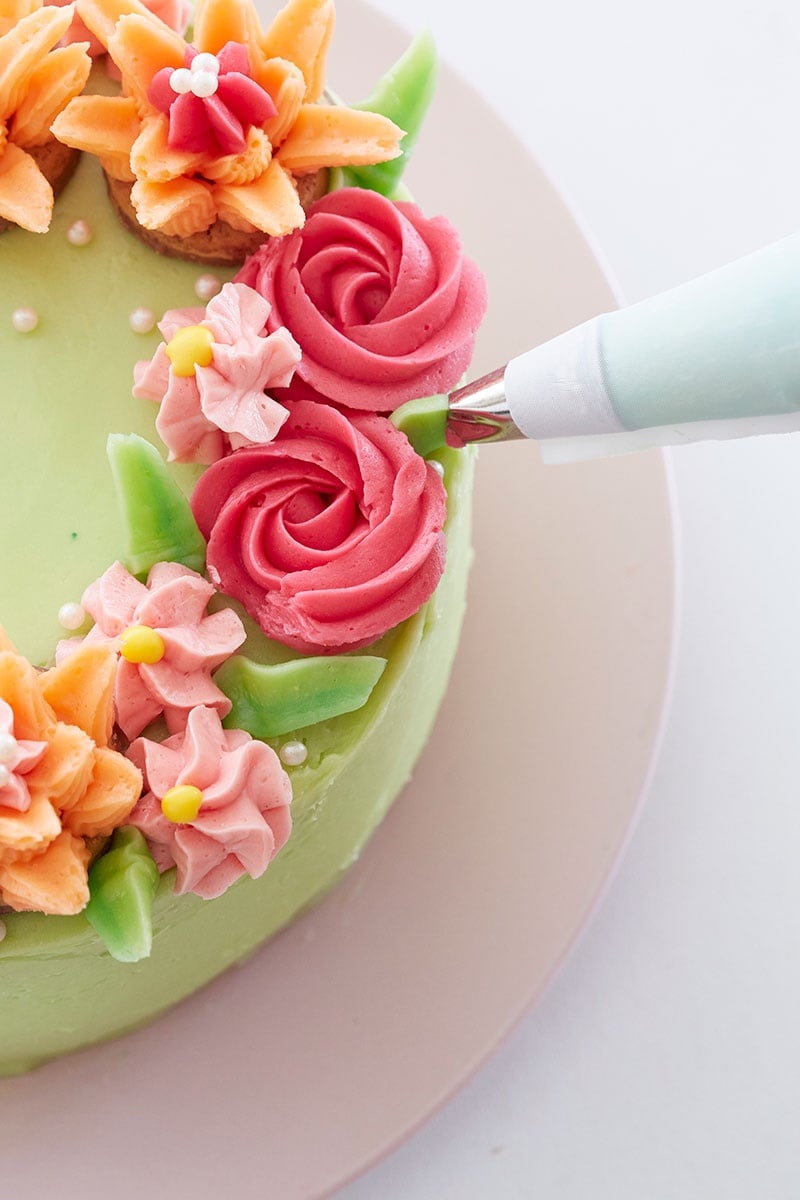
ROSES
• Fill a piping bag with a star nozzle with butter icing in a colour of your choice.
• Keeping the nozzle close to the surface, squeeze the bag from the back, letting the icing slowly ‘drop’ (in other words, you don’t keep the nozzle in the icing as you did with the daisies); then move the star nozzle around the centre in a smooth spiral to form the rose. To finish off, stop applying pressure, then lift the nozzle away from the spiral. If the end point is too noticeable, you can smooth it with the back of a teaspoon, but rather don’t fuss with it too much.
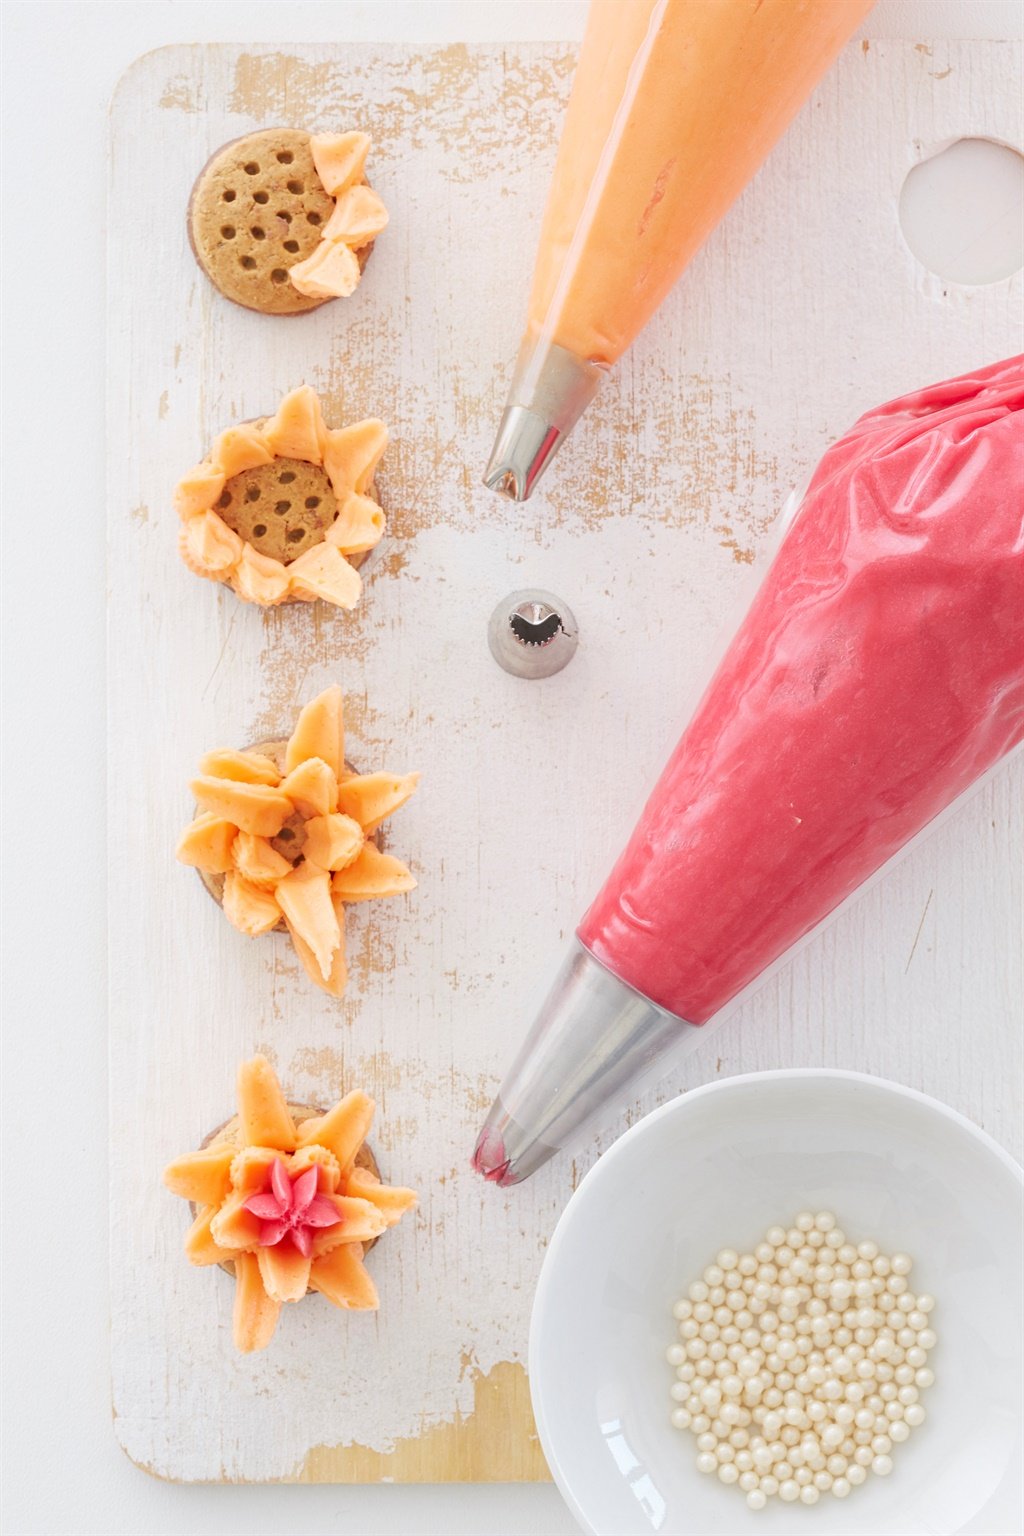
CHRYSANTHEMUMS
• Fill a piping bag with a half-moon ruffle nozzle with butter icing in a colour of your choice. Keep the piping bags you used for the roses and daisies close at hand if there’s any icing left; you will use them here.
• Using a mini digestive biscuit or Marie biscuit as a base, form the outer petals first.
• Keeping the nozzle close to the edge of the biscuit, hold the piping bag so that the curve of the nozzle opening faces outwards. Squeeze gently on the back of the piping bag and lift the nozzle towards the outside of the flower in an even movement. Stop squeezing once the petal is long enough. Repeat all around the edge to create the longer outer petals.
• Using the same technique, create a second row of petals slightly shorter just inside the outer petals. To finish, use the star-nozzle piping bag in the rose or daisy colour and make a small star in the middle. Garnish with a few decorating balls if desired.
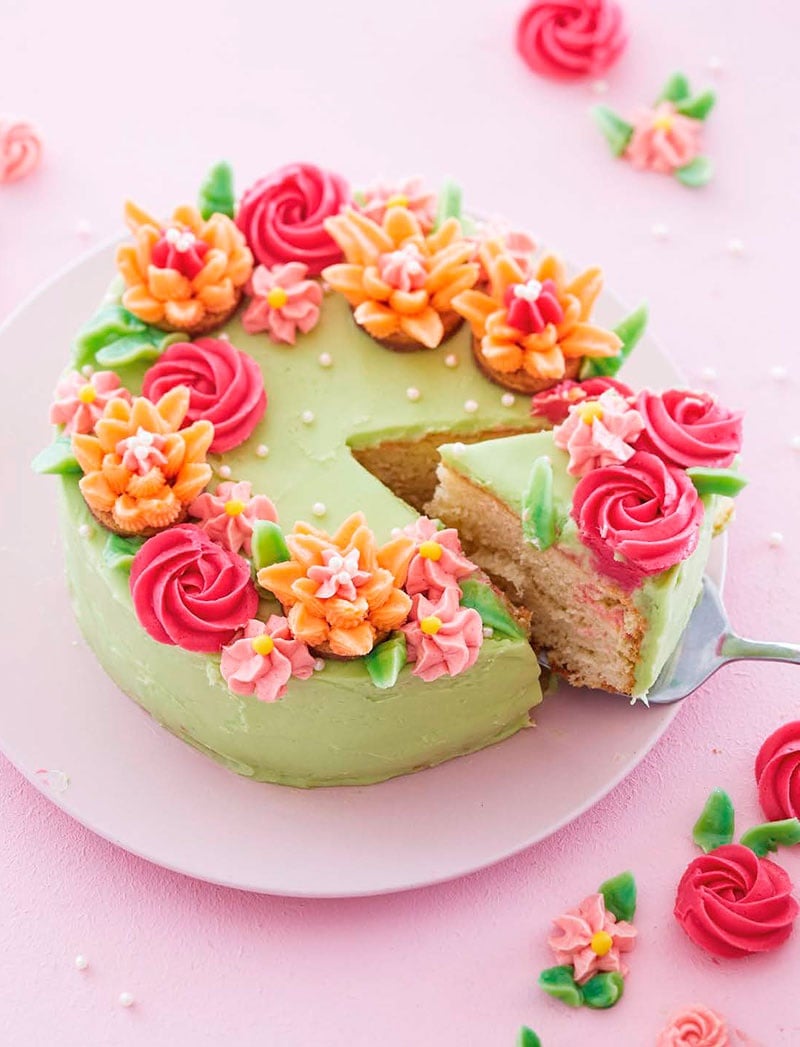
4. Decorate the cake
Using a palette knife or a butter knife, lift the chilled flowers off the baking paper, one by one, and place them in a wreath on top of the cake. We added leaves in the gaps: using the same technique and the half-moon ruffle nozzle you used for the chrysanthemums, create a few green leaves to add here and there among the flowers. Also sprinkle a few cake decorating balls on top.