


 Publications
 Partners


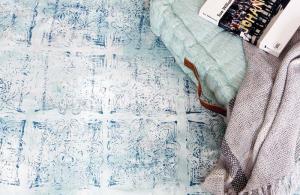
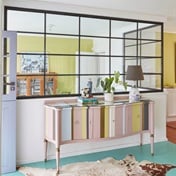
Every entertainment area needs a spot for food and drinks; make this nifty server and box shelf from recycled wood. home November 2014 PROJECT GUIDE
Hard labour 4/10
Skill level 4/10
Time needed ± 2 hours
Finished size (approximately) Server: 870mm (H) x 930mm (W) Box shelf: 550mm (H) x 800mm (W)
Shopping list
• 100 x 20mm pallet planks, cut to: two lengths 830mm (server frame) six lengths 370mm (server frame and shelf supports) three lengths 720mm (server frame) one length 840mm (box shelf top) two lengths 550mm (box shelf frame) three lengths 760mm (box shelf frame and shelf)
• 100 x 40mm pallet planks cut to: four lengths 820mm (server legs)
• 228 x 50mm scaffolding, cut to: two lengths 930mm (server top)
• 550 x 800mm hardboard (box shelf rear)
• fifty 6mm x 40mm chipboard screws
• 2 mounting plates
• 25mm nails
Plus
• 80-grit sandpaper
• wood glue
• paint of your choice (we used two 100ml pots of Annie Sloan Chalk Paint in the colour Old White)
Tools
• cordless screwdriver
• 3mm drill bit
• pencil
• measuring tape
• jigsaw
• angle grinder
• flap disc
• paintbrush
Get started - The Server
1 Make a frame by attaching two of the 370mm planks between the two 830mm planks with glue and screws. Screw a 370mm plank to each end of the frame – this is where you will later attach the top of the server.
2 Turn the frame upside down and screw the four 820mm legs to the corners of the frame at right angles.
3 Measure and mark 160mm from the bottom of the legs and screw the remaining two 370mm planks below this mark as shelf supports for the legs.
4 Stand the table upright and space the three 720mm planks between the shelf supports to make the lower shelf. Glue and screw together. Using the angle grinder and flap disc, remove any cement residue on the scaffolding. Place the two scaffolding planks next to each other on the floor and place the server frame upside down on them. Glue and screw together.
5 Make a frame by screwing together two of the 760mm planks between the two 550mm planks. Attach the remaining 760mm plank between the sides to serve as a shelf. Place the hardboard on the box shelf frame and attach with 25mm nails. Also mark the position of the shelf on the back of the board and hammer a few nails through the board into the shelf. This rear piece will keep the box shelf square.
6 Screw two mounting plates on top of the rear piece; also drill through the third hole into the hardboard to mark where you will position the screws that will hold the box shelf against the wall. Position the 840mm plank on top of the box shelf. Screw and glue together. This top piece adds a bit of character to the box shelf.
To finish
Sand the server and box shelf before you paint (we kept the server top in its natural state). Let it dry completely and sand again
lightly if you’d like a weathered look.
